1. Installation
Download the installation files from the K-Jump home page: https://kjump.no/download.
Install K-Jump by running the installer.
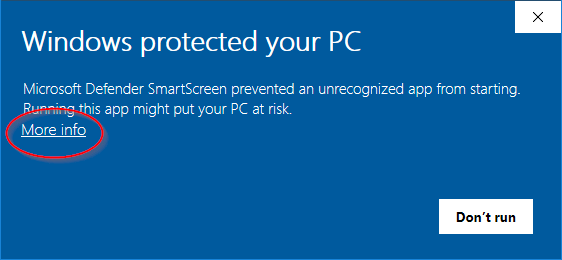
| Windows SmartScreen might show a warning when opening the file. Choose More info and Run anyway to continue the installation. |

2. Quick Start
2.1. Data
| Data can be imported from CSV files. See Import and Export for details. |
Hills
Hills can be found under Hills in the side menu. Hills must be registered on this page before they can be used in competitions.
Click Add to create a new hill.


Enter information about the hill in the popup and click OK to save.
A name, k-point and meter value are required. The other fields are optional and can be left blank. The meter value will be suggested automatically based on the k-point. See Hills for more information.
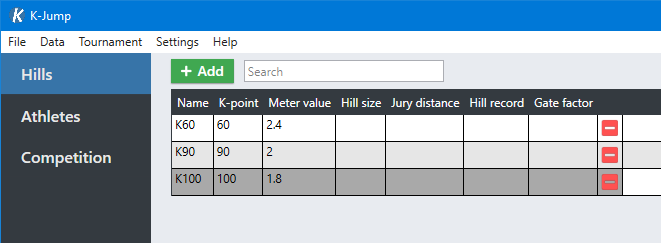
You can modify hills by editing the table.
Athletes
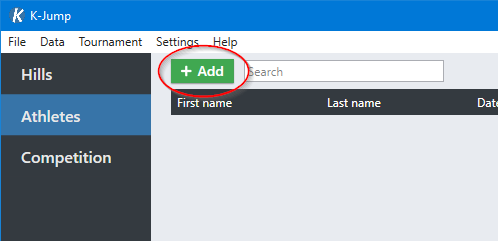
Athletes can be found under Athletes in the side menu. As with hills, athletes must be registered before they can be used in competitions.
Click Add to create a new athlete.
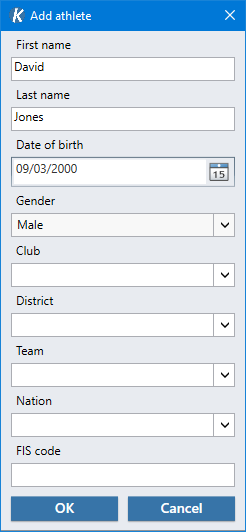
Enter information about the athlete in the popup and click OK to save.
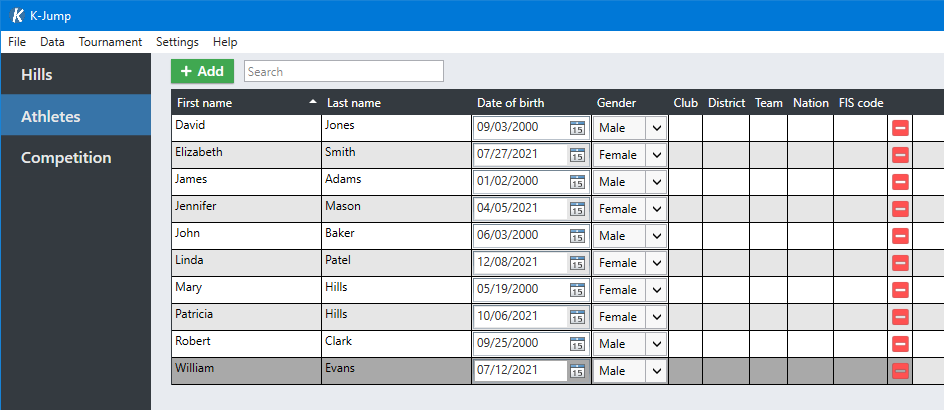
You can modify athletes by editing the table.
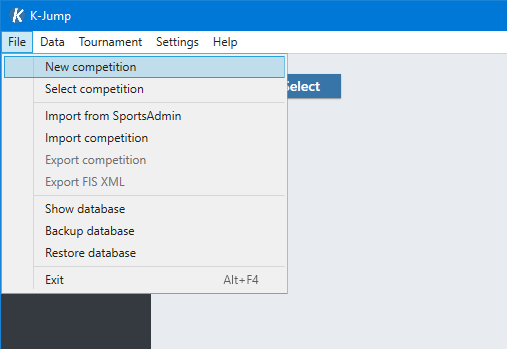
2.2. New Competition
To create a new competition, select .
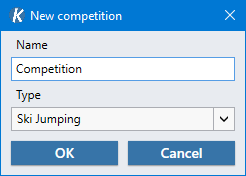
Enter the name and type of the competition. The supported types are Ski Jumping, Nordic Combined and Team Jumping. The type and name can be changed after the competition has been created.
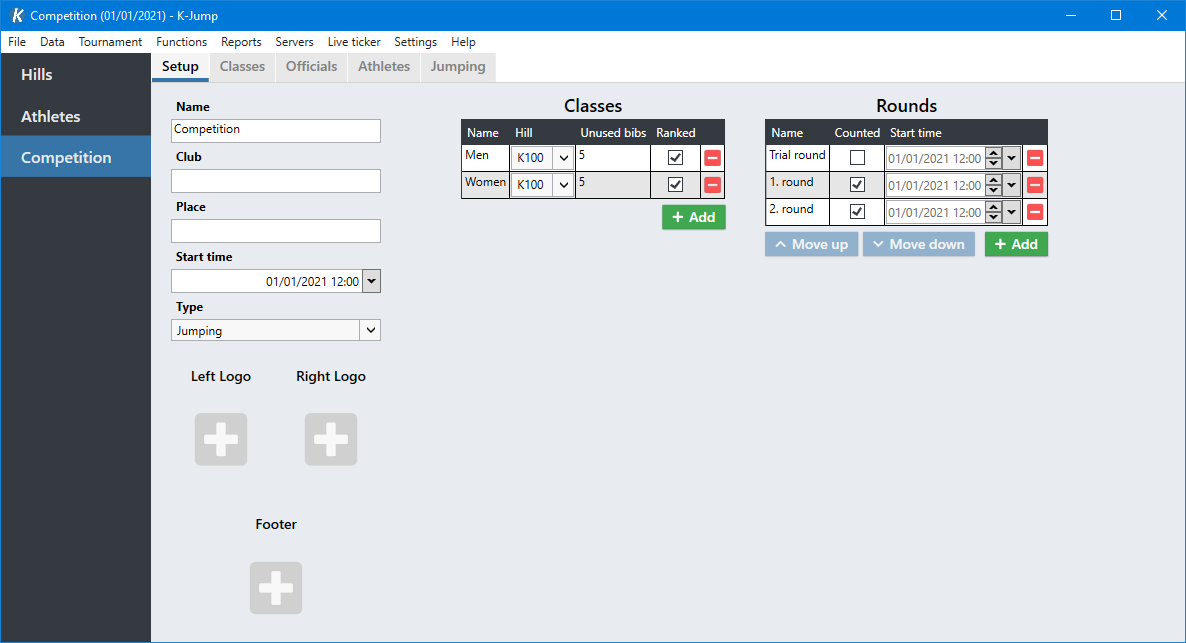
Details such as name and start time of the event can be entered in the Setup tab. This information will be shown in reports.
It is possible to add three different logos which will be shown in reports. See Logos for details.
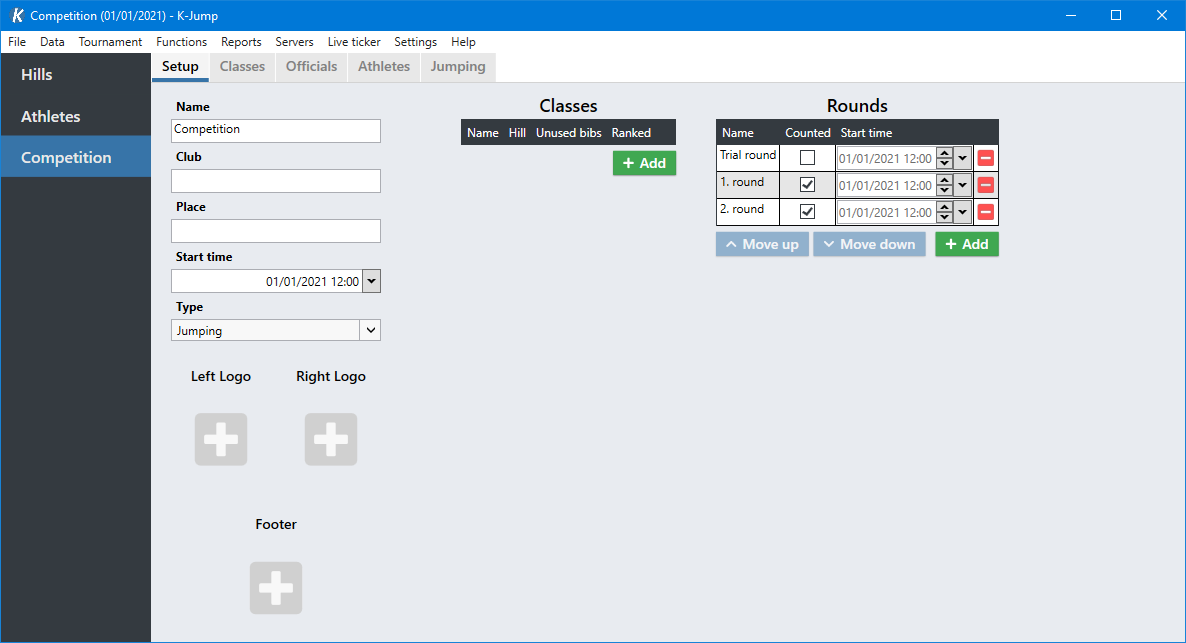
2.3. Classes
There can be multiple classes in a single competition. They are managed in the Setup tab.
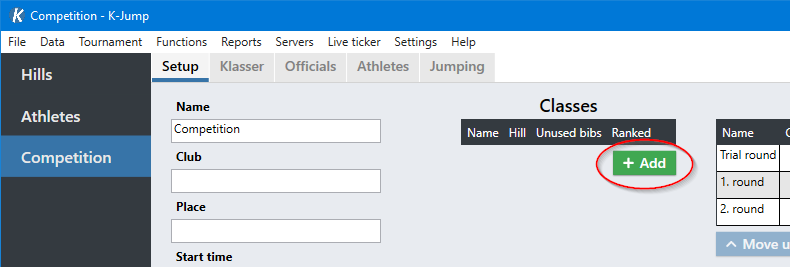
Click Add to create a new class.
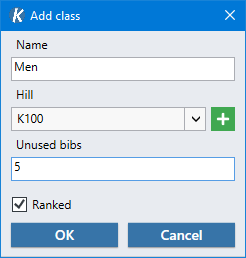
Enter the name of the class and select a hill.
- Unused bibs
The number of bibs which should be reserved and left unused when assigning bib numbers. These bib numbers will be free to use for late entry athletes. See Unused Bibs for details.
- Ranked
Unselect this option if athletes in this class should not be ranked.
| The + button in the popup can be used to quickly create a new hill. |
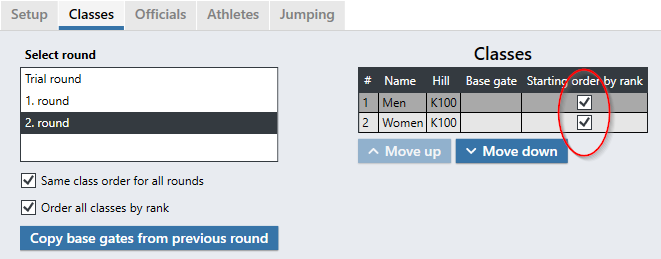
Starting Order
The starting order of classes can be specified for each round in the Classes tab.
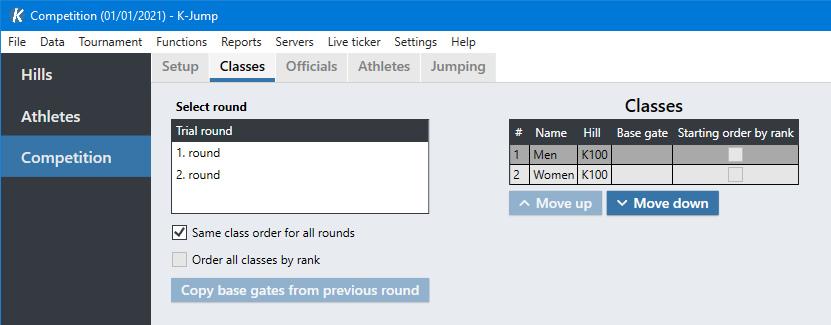
First select a round. Then select a class in the list, and use Move up and Move down to change the class order.
By default, changing the order in one round will change the order in all other rounds. To allow the starting order to be specified individually for each round, unselect Same class order for all rounds.
Additional Options
- Base gate
The gate used as a reference when calculating gate points. This value must be set to enable gate compensation. See Gate Compensation for details.
- Starting order by rank
If enabled, the starting order will be based on results from the previous round. See Ranked Starting Order for details.
Shortcuts
Reset all results for the class in the selected round.
2.4. Rounds
When a new competition is created, three rounds will be added automatically: Trial round, 1. round and 2. round. These can be renamed or removed.
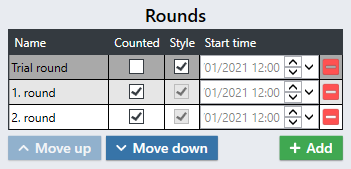
New rounds, such as training or qualification rounds, can be added by clicking Add. Use the buttons Move up and Move down to change the order.
Only rounds marked as Counted will count towards the final results. Trial and training rounds should normally not be counted.
Style points can optionally be disabled in trial rounds. This affects to-beat calculation and the behavior of live ticker/speaker panel.
Start times can be set individually for each round. These start times will be shown instead of the competition start time when creating reports.
2.5. Athletes
Athletes in a competition are managed in the Athletes tab. Athletes must be registered in the database before they can be added to the competition. See Athletes.
Click Add to add an athlete to the competition.
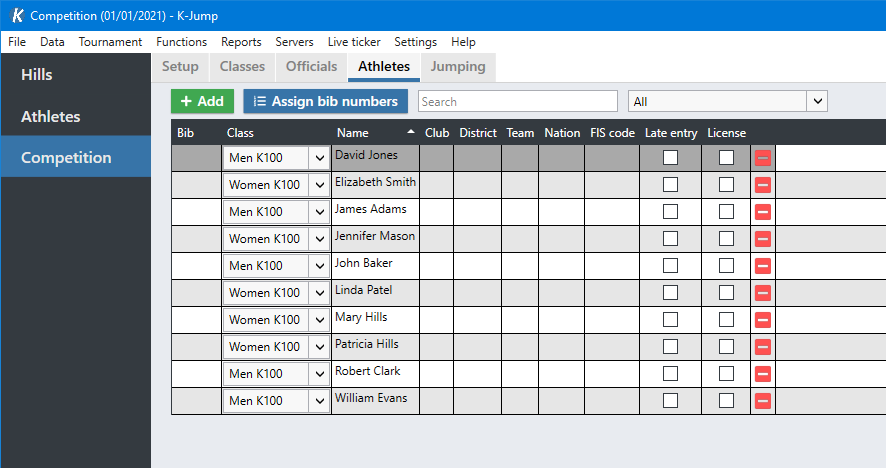

Select an existing athlete and a class and click OK.
- Late entry
See Late Entry.
- License
See License.
| The + buttons in the popup can be used to create new classes or athletes in the database. |
Assigning Bib Numbers
Bib numbers can be assigned automatically using the button Assign bib numbers. It is also possible to enter bib numbers manually in the table.
The first bib number assigned in each class will depend on the number of unused bibs in the class. See Unused Bibs for details.

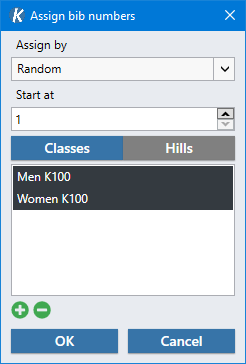
- Assign by
The method to use when assigning bib numbers. Supported options are Random, Name and Seeding.
- Start at
First bib number to be assigned.
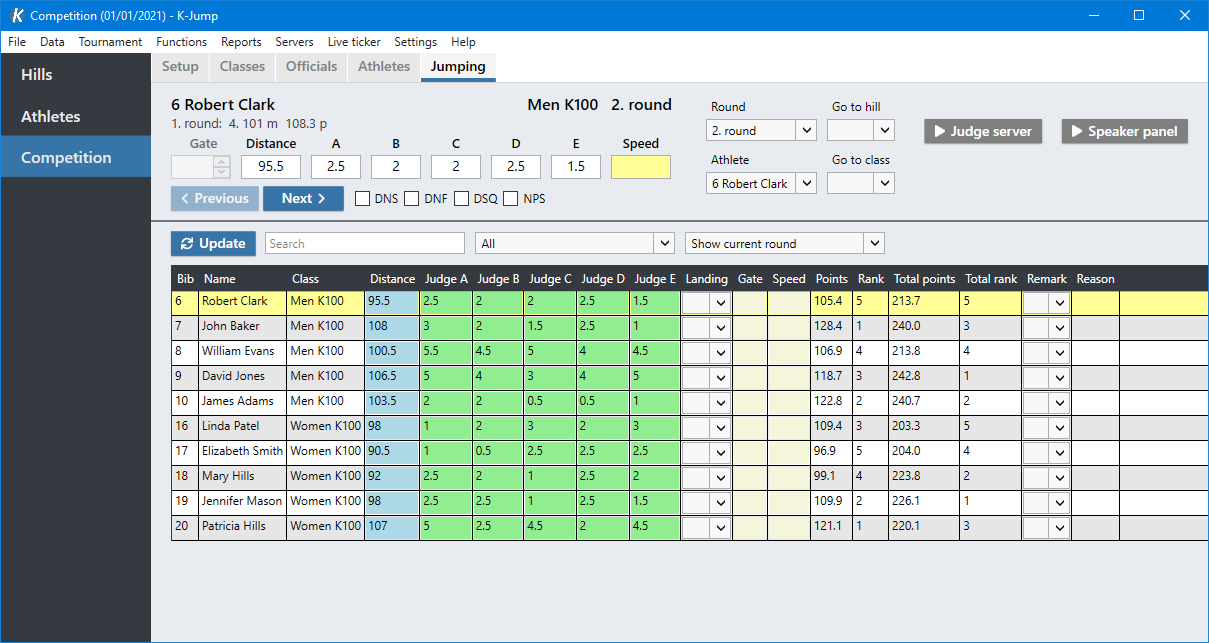
2.6. Ski Jumping
Ski jumping results are registered in the Jumping tab.

Information about the current jumper, class, hill and round will be shown at the top.

The current round and athlete can be changed using the dropdowns on the right side, or by using the Previous and Next buttons.

Values can be entered in the fields manually, or with the Judge panel app. DNS, DNF, DSQ and NPS can also be selected here.
| Press Enter or Shift+Enter to quickly move to the next or previous athlete when editing results. |
3. Data
3.1. Hills
Meter value
The following lookup table is used to suggest meter values when creating new hills:
K-point | 1-19 | 20-24 | 25-29 | 30-34 | 35-39 | 40-49 | 50-59 | 60-69 | 70-79 | 80-99 | 100-169 | 170- |
Meter value | 5.2 | 4.8 | 4.4 | 4.0 | 3.6 | 3.2 | 2.8 | 2.4 | 2.2 | 2.0 | 1.8 | 1.2 |
Points
Landing at the k-point normally grants 60 points. For ski flying hills with k-point ≥ 170 meters, 120 points are granted.
3.2. Import and Export
Both hills and athletes can be imported and exported using comma-separated value (CSV) files. These files can be modified in other applications such as Microsoft Excel.
Import and export functionality can be found under Data in the menu bar.
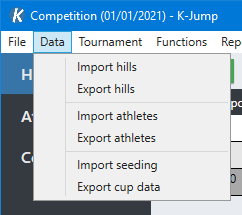
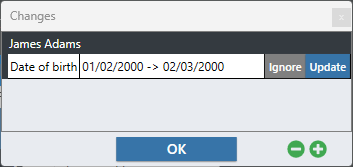
When importing data, you will be asked about overwriting existing data. This affects how changes in data are imported for existing hills and athletes. Select Yes to overwrite any existing data. Select No to manually pick which changes should be imported.
| Hill names are used for matching existing hills. FIS codes and athlete names are used for matching existing athletes. |
4. Ski Jumping
4.1. Athletes
Late Entry
Athletes marked with Late entry will be assigned the first available bib numbers in their class.
License
Marking an athlete with License means they have paid a participation fee. This will be visible in some reports.
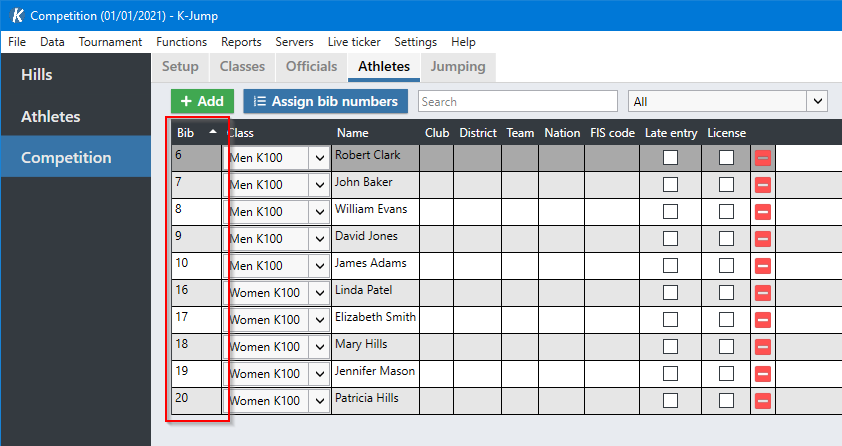
Unused Bibs
The number of unused bibs specified in the class list in the Setup tab affects how bib numbers are assigned. Before bibs are assigned to athletes in a class, the corresponding number of unused bibs for that class will be skipped.
For example, if a class has 5 unused bibs, the first athlete will be assigned bib number 6. The first 5 bibs will be reserved for athletes potentially being registered later.
Shortcuts
Navigate to athlete data.
Replace athlete keeping the results.
4.2. Officials and Judges
Information about officials and judges can be entered in the Officials tab.
This information is hill-specific, and will be shown in reports. Use the Copy and Paste buttons to copy information between hills.
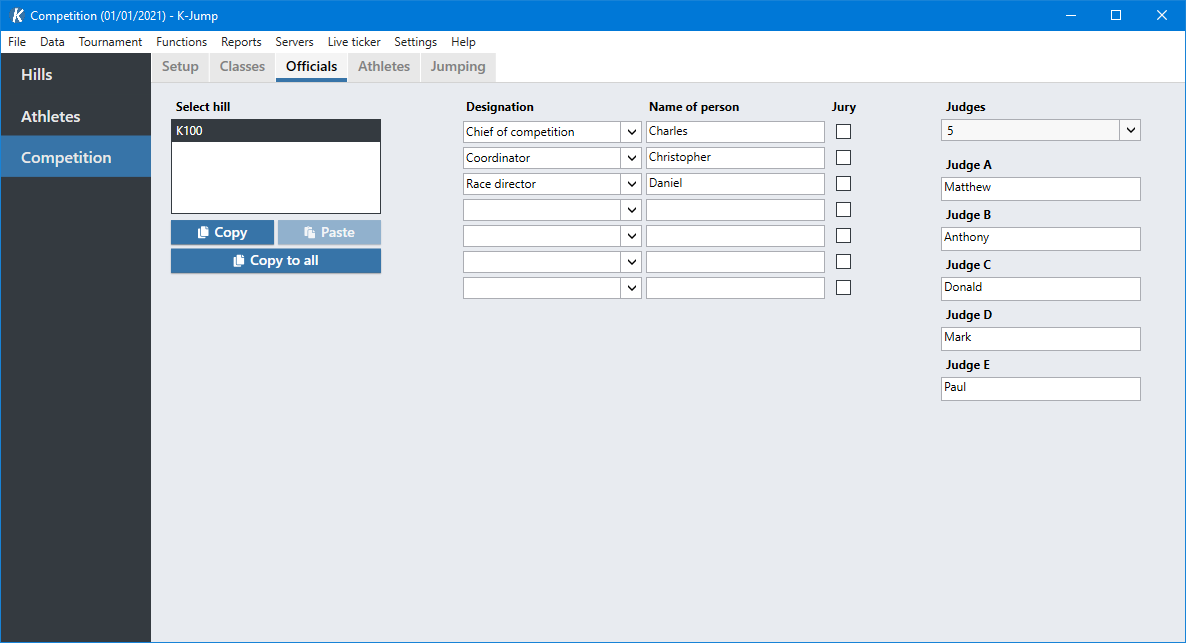
Style Modes
The Judges dropdown specifies the number of judges in the competition.
- 5 judges
Normal judging. The highest and lowest style points will not be counted.
- 3 judges
All three style points are counted.
- 1 judge
Single style point which will be multiplied by 3.
- Distance only
No style points.
- Landing
Alternative to style judging. See Landing Judging.
4.3. Ranked Starting Order
By default, athletes start in the order of their bibs. The starting can also be based on results from the previous round, meaning the athletes with the most points will start last in the round.
To enable this behaviour, select Starting order by rank in the class list.
| This option is not available for unranked classes. |
4.4. Gate Compensation
Setup
To enable gate compensation, base gates must be entered in the Classes tab. Base gates can be set individually for each class in different rounds.
A gate factor must also have been registered for the corresponding hill in the Hills menu. This value is multiplied with the gate difference to calculate gate points.
Automatic Gate Input
When jump data is entered in the Jumping tab, the gate is automatically set to the gate of the previous jump. The base gate is used for the first athlete.
Ignore Gate Points
Gate points can be ignored manually for specific jumps. This is done by right-clicking the gate input field and selecting Ignore gate points. The color will change to red, indicating the gate being ignored. The gate value will be crossed out in result lists. Right-click again to stop ignoring.
4.5. Qualification
The number of qualified athletes can be selected in the Classes tab.
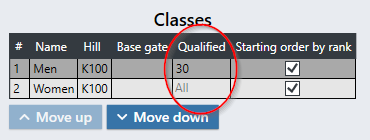
Qualification can be used in multiple rounds. For example in the first round after a qualification round, and in the 2. round.
| Qualification is not available for unranked classes. |
4.6. Jumping Tab
Results
The results overview can be filtered to show results for the current class only, or for a specific hill or class. All results are shown by default.
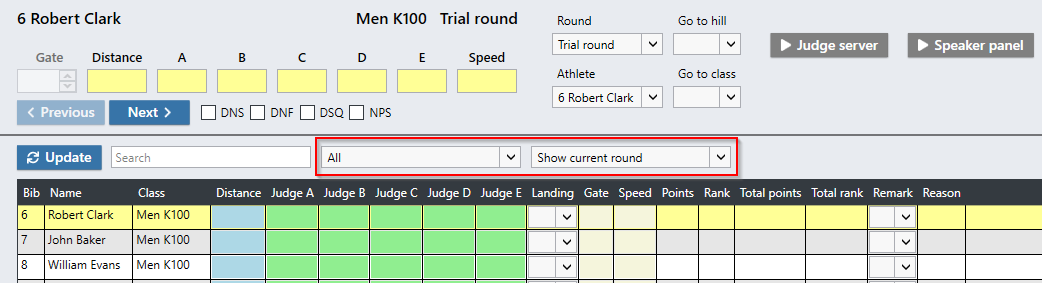
Two different view modes are available:
- Show current round
Show results for the current round only.
- Show all rounds
Show results for all rounds.
Shortcuts
Set the current athlete.
- Ctrl+G
Enter bib and go to athlete.
Update
The Update button can be used to manually refresh the user interface and to recalculate results.
5. Reports
5.1. Report Types
- Club list
List of athletes grouped by club.
- Team list
List of athletes grouped by team.
- Nation list
List of athletes grouped by nation.
- Start list jumping
Ski jumping start list.
- Results jumping
Ski jumping results.
- Text results
Ski jumping results in simple text format.
- Judge list
A list where judges can write down style points. This can be used when typing in results manually.
- Judge protocol
Judge protocol showing style point deductions.
- Start list cross-country
Cross-country start list.
- Results cross-country
Cross-country results.
- Start list lap
Start list for a single lap.
- Results lap
Results for a single lap.
- Lane list
Cross-country start list by lane.
- Total results
Cross-country and jumping results.
- Start list with crotch measurements
Start list containing crotch measurements.
- Start list with body measurements
Start list containing body measurements.
5.2. Options
Multiple options are available for most reports. Some options are only available when required settings are enabled.
- Signature
Add signature field at the bottom.
- Start time
Show start time in header.
- License
Show warning for athletes without license.
- License for younger than 13
Also show license warning for athletes who are younger than 13 years old.
- Show nation
Show nation instead of district.
- Show combined
Show 'K' for combined athletes.
- Unused bibs
Insert empty entries for unused bibs. These can be filled in by hand.
- Include DNS
Include DNS athletes.
- Unranked order
Sort results by bib starting order instead of ranks.
- Speed
Show speed in results.
- FIS Code
Show FIS codes.
- Vertical
Use alternative report layout.
- Show tag numbers
Show cross-country tags.
- Show names
Show athlete names.
5.3. Logos
Logos can be selected in the competition setup. These will be shown in reports. K-Jump supports logos in the upper corners and a footer at the bottom of the page.
Go to the Setup tab, click the + icons in the logos area and select image files. Logos can be removed by clicking the remove button.
| will export the logo to a file. |
| The recommended proportions for footer images are 76:10 (e.g., an image resolution of 760 x 100 pixels or similar). |
6. Live Results
Results from K-Jump can be viewed live in a web browser. Online at kjump.no or offline on a local network.
6.1. Offline
Use Speaker Panel for offline results.
Setup
Navigate to Jumping tab and click Speaker panel to start.
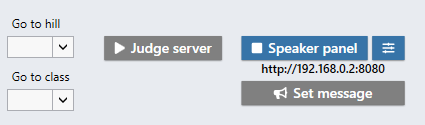
Open a web browser and navigate to the URL shown below the start button.
See Controls for more options.
By default, the server will listen on port 8080 on all interfaces.
6.2. Online
Use Live Ticker to make results available online at kjump.no. This requires a valid K-Jump license and account.
Register competition
Sign in and visit your account page to manage live competition registrations.
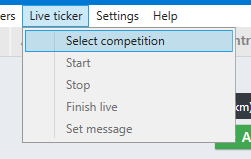
Select competition
After registering the competition online, select it in K-Jump with .
Start and stop
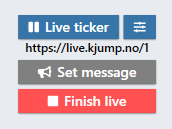
Navigate to Jumping tab and click Live ticker to start publishing results. Press it again to pause.
Press Finish live to disconnect the live ticker. This removes the Live status for the competition.
6.3. Controls
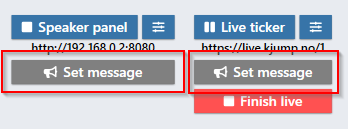
Message
Use Set message to show custom messages on live results.
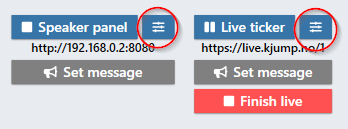
Configuration
Press one of the configuration buttons to open the config window.
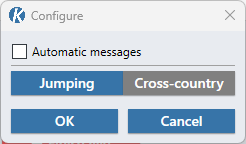
When enabled, some live messages will automatically be shown for a short time.
The following events will trigger automatic messages:
Athlete DSQ
Athlete NPS
Round ended
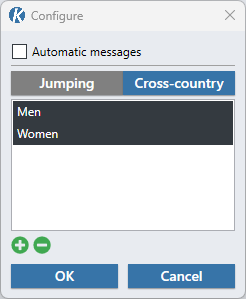
To show cross-country results, open the configuration window and switch to Cross-country mode. At least one class must be selected.
7. Features
7.1. Settings
Advanced Features
Some of the more advanced features are disabled by default. These features can be enabled in settings.
- Qualification
See Qualification.
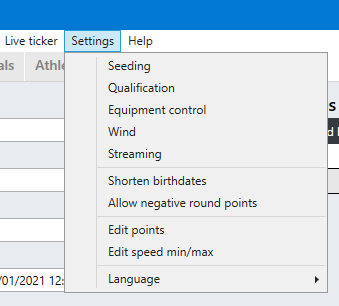
Other Settings
- Shorten birthdates
Show year of birth instead of full birthdate in reports.
- Hide teams
Don’t show team names in reports and live results.
- Allow negative round points
Allow athletes to receive negative points for individual jumps. When disabled, negative points will be replaced with zero.
- Edit points
See Landing Judging.
- Language
User interface language. This setting also controls the default language used in live ticker and speaker panel.
7.2. Database
K-Jump stores all data in a database file located at "C:/Users/%username%/Documents/K-Jump/K-Jump.sqlite". This file can be found by selecting in the menu bar.
The database is automatically backed up when updating K-Jump to a newer version. Backups are stored in the folder "C:/Users/%username%/Documents/K-Jump/Backups".
Backups can be created manually by copying the database file, or by selecting in the menu bar. To restore the database, select . This can be useful when transferring data from one computer to another.
7.3. Logs
Logs can provide useful information when troubleshooting problems. They are stored in the folder "C:/Users/%username%/Documents/K-Jump/Logs", and can be found by selecting .
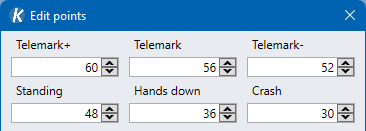
7.4. Landing Judging
Landing judging is an alternative to traditional style judging. Instead of style points, athletes are given points based on how they land.
The following landing types can be selected for each jump: Telemark+ Telemark, Telemark-, Standing, Hands down, Crash. Points are given based on the landing type.
These points can be customized in .
7.5. Missing Bibs
Bib numbers which have been lost, or are unavailable can be registered to be skipped when assigning bib numbers. There are separate lists for ski jumping and cross-country.
To register missing bibs, select .
8. Judge Panel App
The judge panel app can be used as an input panel for judges during competitions. It can be installed on tablets and smartphones.
8.1. Installation
The app is available on Android, iOS, and Windows.
8.2. Configuration
K-Jump Server/PC
Make sure that the K-Jump server and devices are connected to the same network.
Go to the Jumping tab and press Judge server to start. The server IP address will be shown below the button. The address can also be found by opening Command Prompt and entering ipconfig.
App
Launch the app and press the button in the top right corner to open settings.
Select a judge mode and enter the IP address of the K-Jump server. Press anywhere outside the popup to exit settings. The settings button should turn blue when connected to K-Jump.
8.3. Modes
- A, B, C, D, E
Style judging.
- Landing
Alternative landing judging.
- Distance
Input panel for distance.
- Speed
Input panel for speed.
- Equipment
Equipment control.
- Measurements
Body measurements registration.